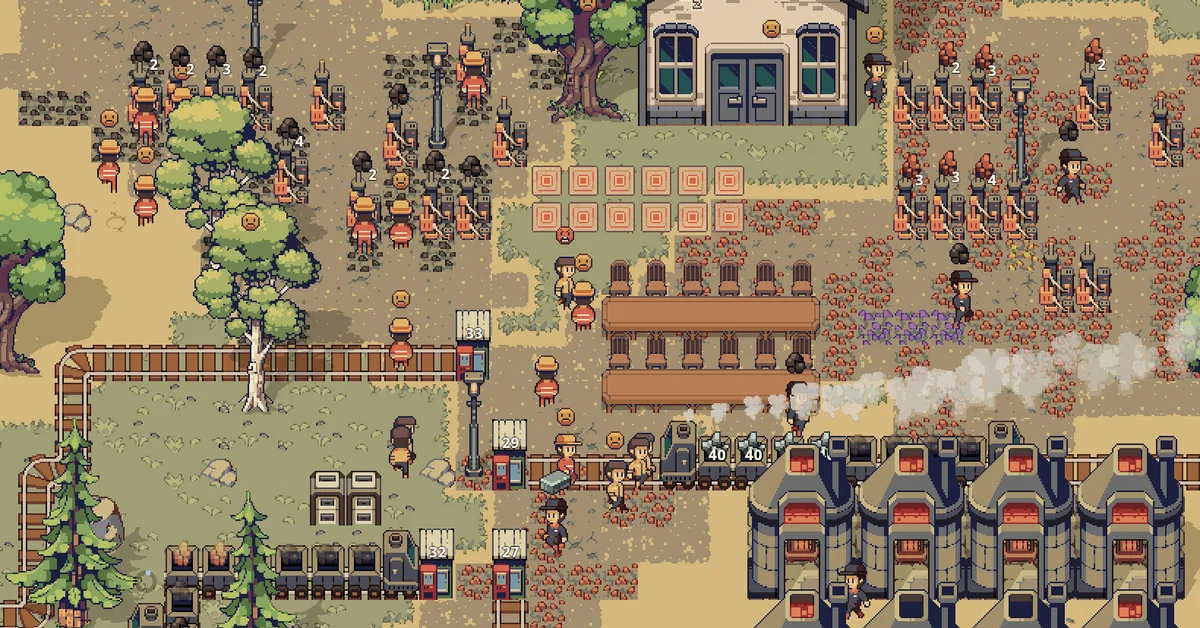
To build a train in Agromatic, place a Train Depot at each end of the route, lay one continuous line of Railroad between them, put a Train Locomotive on a rail tile touching the first depot, add up to 10 wagons in a row behind it, and close the chain with a second Train Locomotive. The train is complete when it reads depot, head, wagons, head, with no gaps or branches. All of these parts come from Railsteel Industries, which opens when you complete the Rail Transport objective.
The build order is strict, and a train that is one piece short simply sits there. Gimcraft’s official Agromatic guide spells out how they work, and everything below follows it and the patch notes as of version 0.6.7.
Unlock Trains First
Trains sit behind the Rail Transport objective, titled “Unlock Railway Systems,” in the objectives pipeline. It is a sales objective: sell the goods it lists and it unlocks the Railsteel Industries store. Check the objective’s window in game for its current targets, since update 0.6.4 changed what the train objective asks for.
Gimcraft lists these Railsteel Industries prices:
| Part | Price | What it does |
|---|---|---|
| Railroad | 100 G per tile | The track. It is a floor-type item |
| Train Depot | 8,000 G | Each end of a route; burns coal to send trains |
| Train Locomotive | 8,000 G | The train head. You need two per train |
| Train Wagon | 3,000 G | Carries one item type; up to 10 per train |
A basic two-depot, two-head train with one wagon is 35,000 G before track, so save up before the objective completes.
Before trains, use Transit Depots. A Transit Depot is crafted at the Woodworks and paired with a logistic worker. Give it one item and a neighboring zone that you own and that has a storage, and workers stack that item into the depot and carry full loads across. It only reaches the zone next door, so for longer hauls you chain depots zone by zone. The developer’s guide calls them a temporary solution until you unlock trains, so do not overbuild them.
How to Build a Train, Step by Step
- Place two depots. Put a Train Depot at each end: one where the goods are made and one where they are needed. A single depot moves nothing.
- Lay the rail. Railroad is a floor-type item, so with the Place tool you can hold Ctrl and drag a rectangle to lay many tiles at once. The line must be continuous. A train with no path never leaves.
- Place the first head. Put a Train Locomotive on a rail tile touching the depot. That creates the train. A head only goes next to a depot or a wagon, never on open rail.
- Add wagons. Each wagon must touch the piece before it, in a row. A train holds 10 wagons at most.
- Close it with a second head. Place another Train Locomotive after the last wagon. The head window lists whatever is still missing, so click a head if the train will not start.
Fuel: The Depot Pays for Every Trip
Fuel is spent by the depot the train leaves from, not by the train itself, and each depot type pays differently:
| Depot | Fuel | Cost per departure |
|---|---|---|
| Train Depot | Coal | One coal per wagon, so a ten-wagon train burns ten coal |
| Volt Depot | Batteries | One battery per trip, whatever the length |
| Power Depot | Electricity | No fuel; it charges from the power grid while idle and spends that charge per wagon |
If a depot cannot pay, an alert on it says why: no power, out of fuel, or not enough fuel for a train that long. A Power Depot on a starved grid means a train that does not move.
Volt trains are a separate network. Volt heads, wagons and depots run on Volt Railroad and never mix with regular rail. A Volt Wagon carries 80 items against a regular wagon’s 40. The Volt parts are sold by Volta Enterprises, the battery and electronics store later in the game.
Running the Train
Click either head to open the train window:
- Turn the train on. While it is off, workers ignore it completely.
- One head loads and the other unloads. The head that counts is the one next to a depot, and it flips as the train turns around, which is what makes the round trip work.
- Wait time is how long the train stays parked before leaving. If it leaves half empty, give it a longer wait.
- Simple departure leaves when the timer runs out. Precise departure leaves at a set point of the day for each depot, where 0% is dawn and 50% is midday.
The train never loads itself. Logistic workers in the zones where it parks do all the loading and unloading.
Set Up What Each Wagon Carries
Click a wagon to configure it:
- Allowed item: the one item that wagon carries.
- Capacity: you can set it below the maximum.
- Same or opposite: follow the head’s load or unload mode, or reverse it. Set one wagon to opposite and the train hauls goods both ways instead of returning empty.
- Keep in zone: the amount the source zone always keeps when loading, so a train never empties a zone you still need stocked.
- Zone limit: what the destination may hold before unloading stops. Whatever is left stays in the wagon.
The developer called those last two “probably the most important change” of the August update. To save time on a long train, hold C and click a configured wagon to copy its settings, then hold V and click another wagon to paste them. Only settings travel, never the contents.
Why Your Train Is Not Loading
Run through this checklist from the developer’s guide:
- The train is switched off.
- The train is moving. Workers never touch a train that is not parked.
- There is no logistic worker in that zone.
- The wagon has no allowed item, or the zone has none of that item.
- The Keep in zone or Zone limit amount is already met.
- The depot is out of fuel.
Make a Train Longer or Shorter
To add a wagon, place it on the free rail tile just past the end head. The head steps out onto that tile and the wagon takes the cell it left. This only works when the train is parked, the tile is empty rail of the same kind, it is the outer head (the depot-side head cannot step out), the train has fewer than 10 wagons, and the head is not on a railroad bridge.
To remove a wagon, hit it with the pickaxe. The train closes up behind it, so the chain never breaks in two, and the wagon and its cargo go back to your inventory. A train below one wagon, or missing a head, is incomplete and stops running, and a train in transit cannot be pickaxed until it parks.
A train is the step before export contracts, which our guide on how to make money fast in Agromatic covers. If rail networks are your favorite part of these games, our Transport Fever 3 train signals guide goes much deeper, and our best Satisfactory mods list has more logistics to build.
Frequently Asked Questions
How do you unlock trains in Agromatic? Complete the Rail Transport objective (“Unlock Railway Systems”), a sales objective that opens the Railsteel Industries store, which sells rail, depots, locomotives and wagons.
Why won’t my Agromatic train move? Usually the chain is incomplete. A train needs a depot at each end, continuous rail, a locomotive at both ends and at least one wagon between them. Click a head to see what is missing, and check that the depot has fuel and the train is switched on.
How many wagons can an Agromatic train have? Up to 10 wagons per train.
What fuel do Agromatic trains use? The departing depot pays. A Train Depot burns one coal per wagon, a Volt Depot uses one battery per trip, and a Power Depot draws charge from the power grid.
Can a train carry goods in both directions? Yes. Set one wagon to “opposite” so it unloads where the others load, and the train hauls both ways.